
SpringBoot 프로젝트 시작하기 12 - 파일서버 구축하기
파일 서버 구축 계기
지난시간까지 프로파일 기능을 추가하는 것을 하였습니다. 프로필 사진없어 좀 아쉽다고 느껴집니다. 이를 어떻게 구현 할 수 있을까? html 기능으로 파일주소를 걸어놓는다고 해도 그건 클라이언트의 파일 주소지 서버 파일 주소가 아닙니다. 프로파일로 다시 재접속했을 때는 텅 빈 사진칸만 남아있을 것입니다. 그렇기에 서버에서 파일을 업로드 및 다운로드가 가능한 파일 서버를 구축해야하는 것입니다. 파일 서버를 새로 만들 수도 있으나 파일관련해서 요청 및 응답이 자주 일어나지 않으니 기존 서버에 파일 업로드 및 다운로드 기능을 추가해 사용할 것입니다.
파일 서버 구축 하기
저는 스프링부트 가이드와 Caillicorder를 주로 참고하였으니 여러분들도 막히는 부분이 있으면 참고바랍니다. 파일 서버를 구축하기 위해 따로 의존성을 추가할 필요가 없습니다. 파일 시스템을 다루는 클래스는 자바에서 기본적으로 제공하는 것을 사용할 것입니다. 우선 사용할 프로퍼티부터 정의할 것입니다.
spring:
    servlet:
        multipart:
            enabled: true
            file-size-threshold: 2KB
            max-file-size: 500MB
            max-request-size: 515MB

file:
    upload-dir: /uploads
각각의 프로퍼티는 여러분들이 하고 싶은 크기와 경로를 지정하면 됩니다. 저의 경우 마침 적절하게 있던 테스트 파일이 용량이 커서 한도를 늘려놨습니다. 우리는 업로드 경로 또한 정하였는데 여기서 루트 경로가 웹서버의 루트 경로가 됩니다. 위와 같이 /uploads로 설정하면 c:\uploads가 업로드 경로가 될 것입니다.
이렇게 선언된 프로퍼티들을 POJO 클래스로 활용하면 매우 편하기 때문에 커스텀 클래스를 선언하겠습니다. 여기서 POJO(Plain Old Java Object)란 간단하게 Bean을 생각하면 되며 자세한 건 여기를 참고하길 바랍니다.
@Getter
@Setter
@ConfigurationProperties(prefix = "file")
public class FileStorageProperties {
    private String uploadDir;
}
기존에 main 클래스에도 @EnableConfigurationProperties를 추가시켜야 합니다.
@SpringBootApplication
@EnableConfigurationProperties({ FileStorageProperties.class })
public class DemoApplication {

	public static void main(String[] args) {
		SpringApplication.run(DemoApplication.class, args);
	}

}
그 밖에 Controller와 Payload, Service, Exception등을 만들어 봅시다.
@RestController
public class FileController {

    private static final Logger logger = LoggerFactory.getLogger(FileController.class);

    @Autowired
    private FileStorageService fileStorageService;

    @PostMapping("/uploadFile")
    public UploadFileResponse uploadFile(@RequestParam("file") MultipartFile file) {
        String fileName = fileStorageService.storeFile(file);

        String fileDownloadUri = ServletUriComponentsBuilder.fromCurrentContextPath()
                .path("/downloadFile/")
                .path(fileName)
                .toUriString();

        return new UploadFileResponse(fileName, fileDownloadUri,
                file.getContentType(), file.getSize());
    }

    @PostMapping("/uploadMultipleFiles")
    public List<UploadFileResponse> uploadMultipleFiles(@RequestParam("files") MultipartFile[] files) {
        return Arrays.asList(files)
                .stream()
                .map(file -> uploadFile(file))
                .collect(Collectors.toList());
    }

    @GetMapping("/downloadFile/{fileName:.+}")
    public ResponseEntity<Resource> downloadFile(@PathVariable String fileName, HttpServletRequest request) {
        // Load file as Resource
        Resource resource = fileStorageService.loadFileAsResource(fileName);

        // Try to determine file's content type
        String contentType = null;
        try {
            contentType = request.getServletContext().getMimeType(resource.getFile().getAbsolutePath());
        } catch (IOException ex) {
            logger.info("Could not determine file type.");
        }

        // Fallback to the default content type if type could not be determined
        if(contentType == null) {
            contentType = "application/octet-stream";
        }

        return ResponseEntity.ok()
                .contentType(MediaType.parseMediaType(contentType))
                .header(HttpHeaders.CONTENT_DISPOSITION, "attachment; filename=\"" + resource.getFilename() + "\"")
                .body(resource);
    }
}
uploadFile메소드는 설명이 필요한 듯 하여 아래에 적겠습니다.
UriComponents : URI 구성 요소 컬렉션을 나타내며 구성 요소 유형을 문자열 값에 매핑합니다.
ServletUriComponentsBuilder : UriComponents에서 팩토리를 추출하는 정적 팩토리 메소드를 제공합니다.
fromContextPath : 주어진 요청의 호스트, 포트, 체계 및 컨텍스트 경로로 초기화 된 빌더를 리턴합니다.
uploadFile : 서버에 업로드된 파일의 주소를 URI로 변환된 것을 fileDownloadUri 변수에 저장하여 리턴합니다.
public class UploadFileResponse {
    private String fileName;
    private String fileDownloadUri;
    private String fileType;
    private long size;

    public UploadFileResponse(String fileName, String fileDownloadUri, String fileType, long size) {
        this.fileName = fileName;
        this.fileDownloadUri = fileDownloadUri;
        this.fileType = fileType;
        this.size = size;
    }
}
@Service
public class FileStorageService {

    private final Path fileStorageLocation;

    @Autowired
    public FileStorageService(FileStorageProperties fileStorageProperties) {
        this.fileStorageLocation = Paths.get(fileStorageProperties.getUploadDir())
                .toAbsolutePath().normalize();

        try {
            Files.createDirectories(this.fileStorageLocation);
        } catch (Exception ex) {
            throw new FileStorageException("Could not create the directory where the uploaded files will be stored.", ex);
        }
    }

    public String storeFile(MultipartFile file) {
        // Normalize file name
        String fileName = StringUtils.cleanPath(file.getOriginalFilename());

        try {
            // Check if the file's name contains invalid characters
            if(fileName.contains("..")) {
                throw new FileStorageException("Sorry! Filename contains invalid path sequence " + fileName);
            }

            // Copy file to the target location (Replacing existing file with the same name)
            Path targetLocation = this.fileStorageLocation.resolve(fileName);
            Files.copy(file.getInputStream(), targetLocation, StandardCopyOption.REPLACE_EXISTING);

            return fileName;
        } catch (IOException ex) {
            throw new FileStorageException("Could not store file " + fileName + ". Please try again!", ex);
        }
    }

    public Resource loadFileAsResource(String fileName) {
        try {
            Path filePath = this.fileStorageLocation.resolve(fileName).normalize();
            Resource resource = new UrlResource(filePath.toUri());
            if(resource.exists()) {
                return resource;
            } else {
                throw new MyFileNotFoundException("File not found " + fileName);
            }
        } catch (MalformedURLException ex) {
            throw new MyFileNotFoundException("File not found " + fileName, ex);
        }
    }
}
MultipartFile 객체의 스트림을 getInputStream메소드로 읽어들여 리턴하는 방식을 사용합니다.
@ResponseStatus(HttpStatus.NOT_FOUND)
public class MyFileNotFoundException extends RuntimeException {
    public MyFileNotFoundException(String message) {
        super(message);
    }

    public MyFileNotFoundException(String message, Throwable cause) {
        super(message, cause);
    }
}
public class FileStorageException extends RuntimeException {
    public FileStorageException(String message) {
        super(message);
    }

    public FileStorageException(String message, Throwable cause) {
        super(message, cause);
    }
}
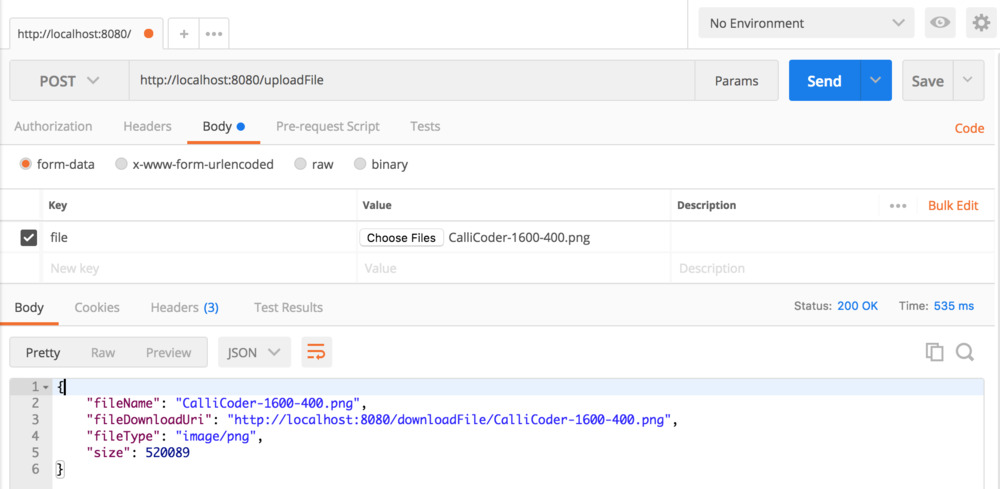
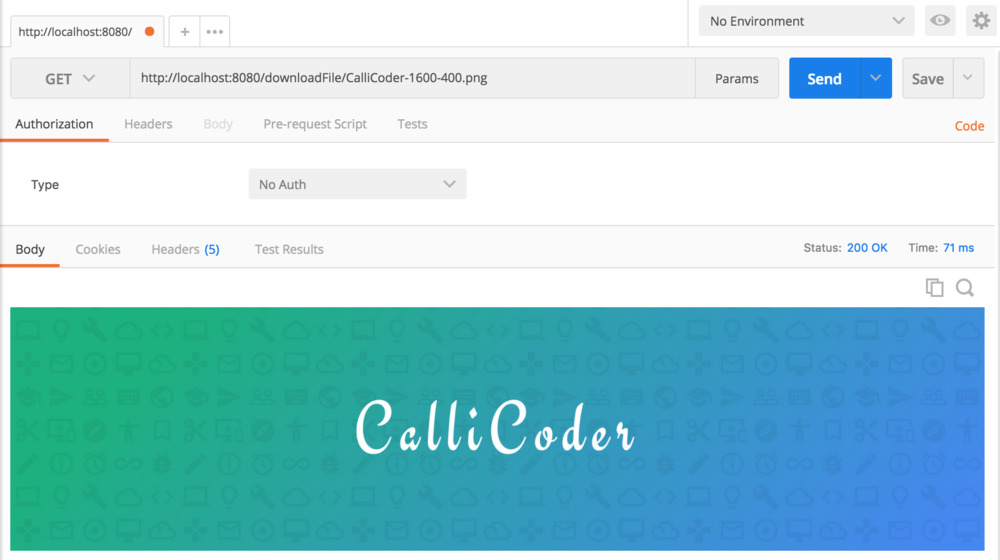
전부 다 입력했다면 서버를 실행 시키고 Postman으로 업로드 요청과 다운로드 요청을 보내면 아래 사진처럼 뜰 것입니다.
FileInfo Entity 클래스
위 코드로 화면에서 업로드하거나 파일의 URI 주소를 입력해서 다운로드 하는 것은 가능 할 것입니다.
문제는 다시 접속했을 때 이전의 리스트를 어떻게 다시 불러올 지 문제가 생깁니다. 서버의 파일 시스템을 읽어들여 리스트를 만드는 방법도 있겠지만 저는 다른 방법을 사용하겠습니다. 데이터베이스 상에 FileInfo 테이블을 생성하여 서비스가 작동하면 테이블의 정보 또한 수정할 수 있도록 만들 것입니다. 그렇다면 우선 FileInfo Entity 클래스부터 만들어 보도록 하겠습니다.
@Entity
@Getter
@Setter
@NoArgsConstructor
@Table(name = "files")
public class FileInfo {

    @Id
    @GeneratedValue(strategy = GenerationType.IDENTITY)
    private Long id;

    @Column(unique = true)
    private String name;

    private String downloadUri;

    private String type;

    private Long size;

    @CreationTimestamp
    private LocalDateTime createdAt;

    @UpdateTimestamp
    private LocalDateTime updatedAt;

    @Builder
    public FileInfo(String name, String downloadUri, String type, Long size) {
        this.name = name;
        this.downloadUri = downloadUri;
        this.type = type;
        this.size = size;
    }

    public FileInfo build(String name, String downloadUri, String type, Long size) {
        FileInfo fileInfo = new FileInfo();
        fileInfo.setName(name);
        fileInfo.setDownloadUri(downloadUri);
        fileInfo.setType(type);
        fileInfo.setSize(size);
        return fileInfo;
    }
}
Controller와 Service에서 생성됬던 파일정보들을 저장할 수 있도록 속성을 추가하였습니다. 다음은 Controller입니다.
@RestController
@RequestMapping("/api/file")
public class FileController {

    private static final Logger logger = LoggerFactory.getLogger(FileController.class);

    @Autowired
    private FileStorageService fileStorageService;

    @PostMapping("/uploadFile")
    public UploadFileResponse uploadFile(@RequestParam("file") MultipartFile file) {
        String fileName = fileStorageService.storeFile(file);

        String fileDownloadUri = ServletUriComponentsBuilder.fromCurrentContextPath().path("/api/file/downloadFile/")
                .path(fileName).toUriString();
        fileStorageService.saveFileInfo(fileName, fileDownloadUri, file.getContentType(), file.getSize());
        return new UploadFileResponse(fileName, fileDownloadUri, file.getContentType(), file.getSize());
    }

    @PostMapping("/uploadMultipleFiles")
    public List<UploadFileResponse> uploadMultipleFiles(@RequestParam("files") MultipartFile[] files) {
        return Arrays.asList(files).stream().map(file -> uploadFile(file)).collect(Collectors.toList());
    }

    @GetMapping("/downloadFile/{fileName:.+}")
    public ResponseEntity<Resource> downloadFile(@PathVariable String fileName, HttpServletRequest request) {
        // // Load file as Resource
        Resource resource = fileStorageService.loadFileAsResource(fileName);

        // Try to determine file's content type
        String contentType = null;
        try {
            contentType = request.getServletContext().getMimeType(resource.getFile().getAbsolutePath());
        } catch (IOException ex) {
            logger.info("Could not determine file type.");
        }

        // Fallback to the default content type if type could not be determined
        if (contentType == null) {
            contentType = "application/octet-stream";
        }
        return ResponseEntity.ok().contentType(MediaType.parseMediaType(contentType))
                .header(HttpHeaders.CONTENT_DISPOSITION, "attachment; filename=\"" + resource.getFilename() + "\"")
                .body(resource);
    }
}
기존의 업로드와 다운로드에서 fileinfo를 추가한 서비스를 사용하였으며, fileinfo 테이블에 각 속성에 맞는 값을 넣을 수 있도록 MultipartFile 객체에서 제공하는 메소드를 통해 데이터를 입력하였습니다. 이제 서비스에 대해 기술할 것입니다.
@Service
public class FileStorageService {

    private final Path fileStorageLocation;

    @Autowired
    private FileInfoRepository fileInfoRepository;

    @Autowired
    public FileStorageService(FileStorageProperties fileStorageProperties) {
        this.fileStorageLocation = Paths.get(fileStorageProperties.getUploadDir()).toAbsolutePath().normalize();

        try {
            Files.createDirectories(this.fileStorageLocation);
        } catch (Exception ex) {
            throw new FileStorageException("Could not create the directory where the uploaded files will be stored.",
                    ex);
        }
    }

    public void saveFileInfo(String name, String downloadUri, String type, Long size) {
        FileInfo fileInfo = new FileInfo();

        if (fileInfoRepository.existsByName(name)) {
            fileInfo = fileInfoRepository.findByName(name)
                    .orElseThrow(() -> new FileStorageException("FileInfo not found with name : " + name));
        }

        fileInfo.setName(name);
        fileInfo.setDownloadUri(downloadUri);
        fileInfo.setType(type);
        fileInfo.setSize(size);

        fileInfoRepository.save(fileInfo);
    }

    public String storeFile(MultipartFile file) {
        // Normalize file name
        String fileName = StringUtils.cleanPath(file.getOriginalFilename());

        try {
            // Check if the file's name contains invalid characters
            if (fileName.contains("..")) {
                throw new FileStorageException("Sorry! Filename contains invalid path sequence " + fileName);
            }

            // Copy file to the target location (Replacing existing file with the same name)
            Path targetLocation = this.fileStorageLocation.resolve(fileName);
            Files.copy(file.getInputStream(), targetLocation, StandardCopyOption.REPLACE_EXISTING);

            return fileName;
        } catch (IOException ex) {
            throw new FileStorageException("Could not store file " + fileName + ". Please try again!", ex);
        }
    }

    public Resource loadFileAsResource(String fileName) {
        try {
            Path filePath = this.fileStorageLocation.resolve(fileName).normalize();
            Resource resource = new UrlResource(filePath.toUri());
            if (resource.exists()) {
                return resource;
            } else {
                throw new MyFileNotFoundException("File not found " + fileName);
            }
        } catch (MalformedURLException ex) {
            throw new MyFileNotFoundException("File not found " + fileName, ex);
        }
    }
}
Repository도 추가해야합니다.
public interface FileInfoRepository extends JpaRepository<FileInfo, String> {
    Optional<FileInfo> findByName(String name);
    Boolean existsByName(String name);
}
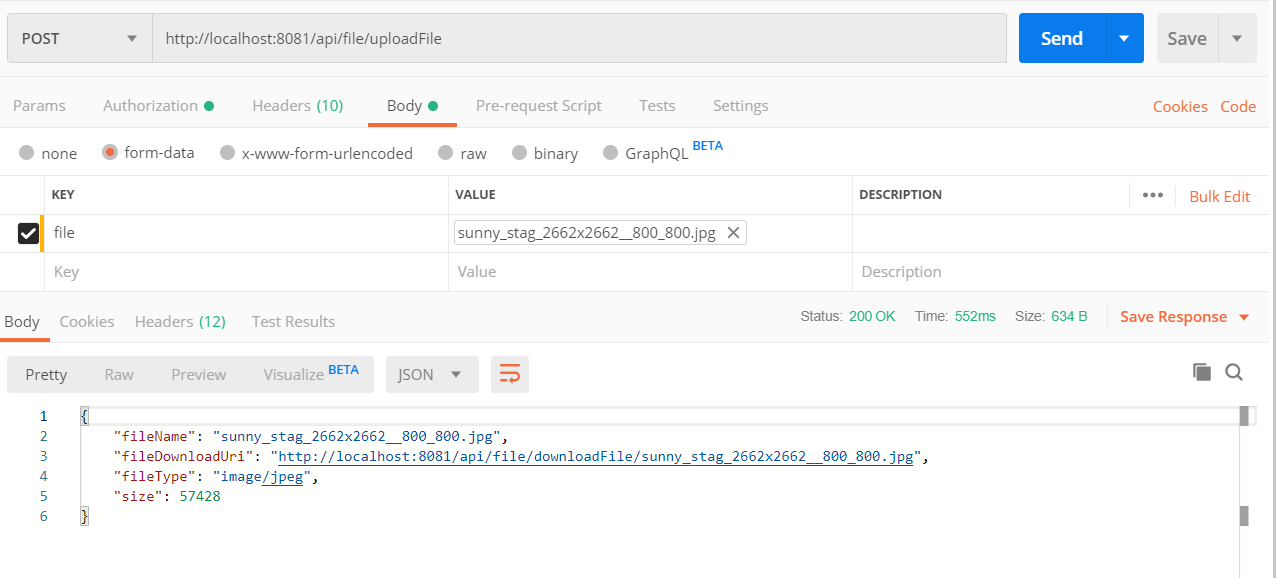
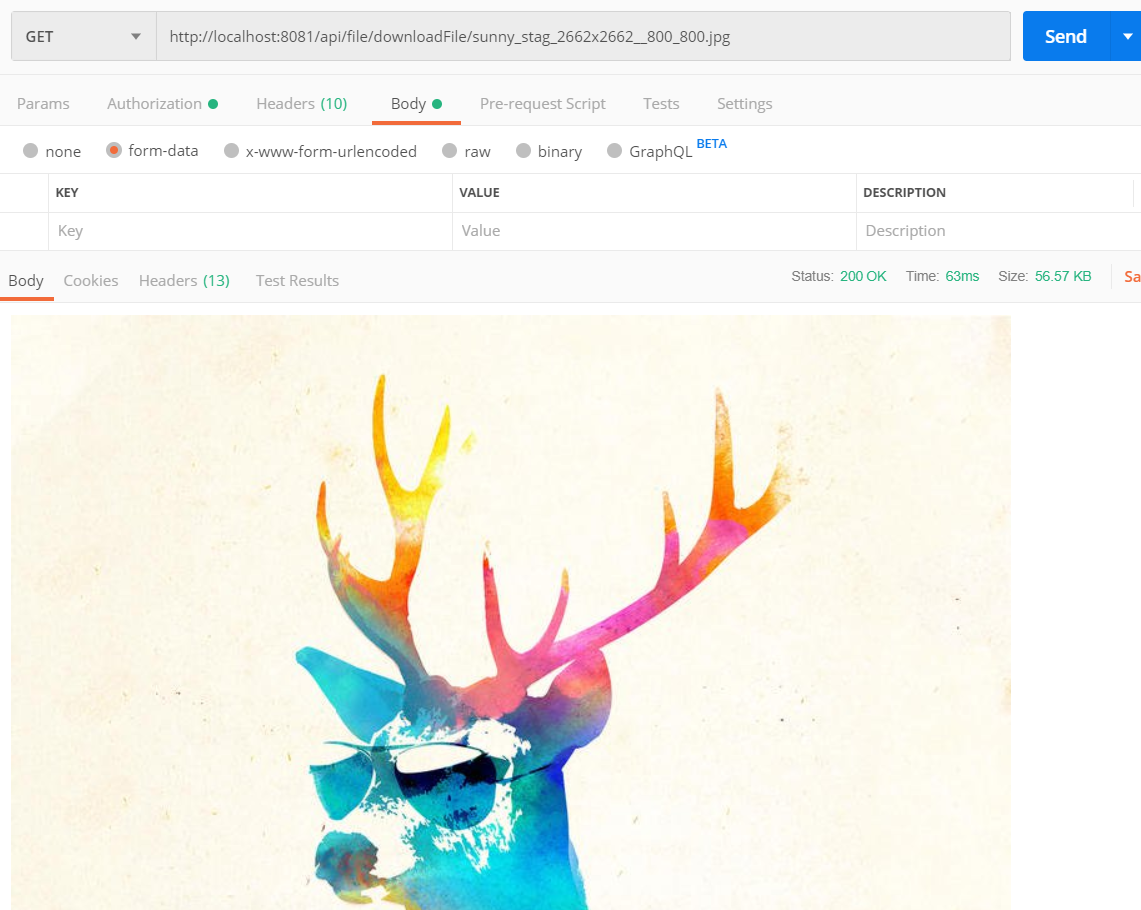
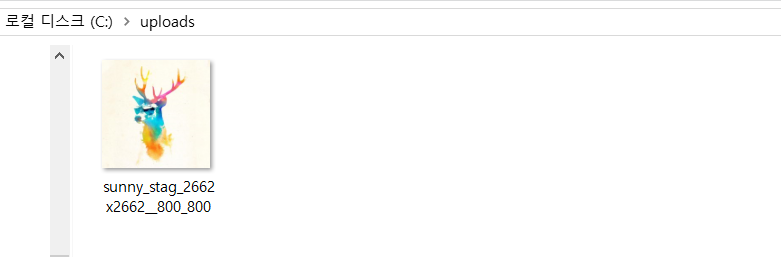
위 모든 작업을 끝맞췄다면 파일을 업로드과 다운로드 그리고 업로드 폴더를 확인해 봅시다. 잘 되었다면 아래의 사진처럼 나올것입니다.

다음 포스트에서는 파일 삭제와 멀티 다운로드 구현과 fileinfo 테이블에서 리스트를 출력하고 앱 Grid로 만들어 화면에 보여지게 만드는 것과 버튼에 각 기능을 입히는 것을 해보도록 하겠습니다.